Vorpal Examples

Return to the main Vorpal page


Creating a simple model with Vorpal is an easy task. These step-by-step instructions give examples of creating a set of chessmen. A zip file containing the VPL files for the chessmen is here.

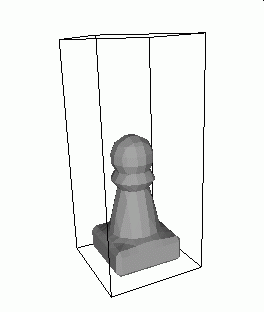
Pawn

  1. New Workspace: 12 x 26 x 12
  2. New Box Brush: 10 x 5 x 10
  3. Move to 1,0,1
  4. Add Brush (Creates the base)
  5. New Cone Brush: 10 x 10 x 10
  6. Move to 1,3,1
  7. Add Brush (Creates the body)
  8. New Ellipsoid Brush: 8 x 3 x 8
  9. Move to 2,9,2
  10. Add Brush (Creates the collar)
  11. Brush: Ellipsoid 8 x 8 x 8
  12. Move to 2,9,2
  13. Add Brush (Creates the head)
Image of Pawn

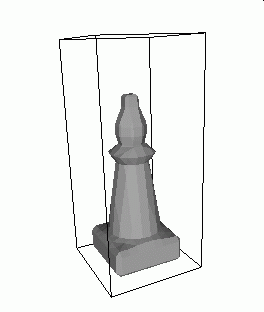
Bishop

  1. New Workspace: 12 x 26 x 12
  2. New Box Brush: 10 x 5 x 10
  3. Move to 1,0,1
  4. Add Brush (Creates the base)
  5. New Cone Brush: 10 x 15 x 10
  6. Move to 1,3,1
  7. Add Brush (Creates the body)
  8. New Ellipsoid Brush: 8 x 3 x 8
  9. Move to 2,12,2
  10. Add Brush (Creates the collar)
  11. New Ellipsoid Brush: 4 x 4 x 4
  12. Move to 4,17,4
  13. Add Brush (Creates the hat)
  14. New Ellipsoid Brush: 6 x 8 x 6
  15. Move to 3,12,3
  16. Subtract Brush (Clears the head region)
  17. Add Brush (Creates the head)
Image of Bishop

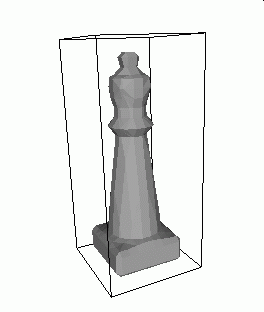
Queen

  1. New Workspace: 12 x 26 x 12
  2. New Box Brush: 10 x 5 x 10
  3. Move to 1,0,1
  4. Add Brush (Creates the base)
  5. New Cone Brush: 10 x 18 x 10
  6. Move to 1,3,1
  7. Add Brush (Creates the body)
  8. New Ellipsoid Brush: 8 x 3 x 8
  9. Move to 2,15,2
  10. Add Brush (Creates the collar)
  11. New Cylinder Brush: 6 x 6 x 6
  12. Move to 3,16,3
  13. Subtract Brush (Clears the head region)
  14. Add Brush (Creates the head)
  15. New Ellipsoid Brush: 8 x 3 x 8
  16. Move to 2,19,2
  17. Add Brush (Creates the crown)
Image of Queen

King

  1. New Workspace: 12 x 26 x 12
  2. New Box Brush: 10 x 5 x 10
  3. Move to 1,0,1
  4. Add Brush (Creates the base)
  5. New Cone Brush: 10 x 18 x 10
  6. Move to 1,3,1
  7. Add Brush (Creates the body)
  8. New Ellipsoid Brush: 8 x 3 x 8
  9. Move to 2,15,2
  10. Add Brush (Creates the collar)
  11. New Cylinder Brush: 6 x 6 x 6
  12. Move to 3,16,3
  13. Subtract Brush (Clears the head region)
  14. Add Brush (Creates the head)
  15. New Cone Brush: 8 x 6 x 8
  16. Move to 2,17,2
  17. Rotate X-axis
  18. Rotate X-axis (Points the cone down)
  19. Add Brush (Creates the crown)
  20. New Cone Brush: 4 x 4 x 4
  21. Move to 4,21,4
  22. Rotate X-axis
  23. Rotate X-axis (Points the cone down)
  24. Add Brush (Creates the peak of the crown)
Image of King

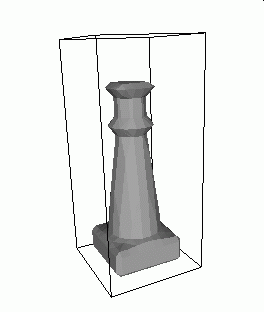
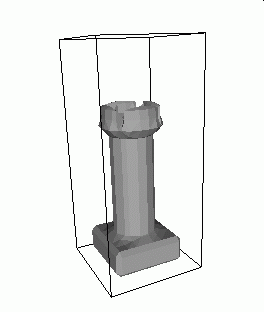
Rook

  1. New Workspace: 12 x 26 x 12
  2. New Box Brush: 10 x 5 x 10
  3. Move to 1,0,1
  4. Add Brush (Creates the base)
  5. New Cylinder Brush: 8 x 15 x 8
  6. Move to 2,3,2
  7. Add Brush (Creates the tower)
  8. New Cylinder Brush: 10 x 5 x 10
  9. Move to 1,15,1
  10. Add Brush (Creates the parapet)
  11. New Cylinder Brush: 6 x 3 x 6
  12. Move to 3,17,3
  13. Subtract Brush
  14. Subtract Brush
  15. Subtract Brush (Hollows out the center of the parapet)
  16. Move to 3,16,3
  17. Subtract Brush (Hollows out the floor of the parapet)
Image of Rook

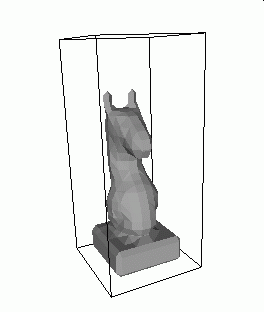
Knight

The knight shown to the right is a complex structure created with many ellipsoid brushes, adding and subtracting. Create your own, better knight with Vorpal!

Image of Knight

Valid XHTML 1.0!   Return to the main Vorpal page   Valid CSS!